Coconut Cream Cake
About this recipe
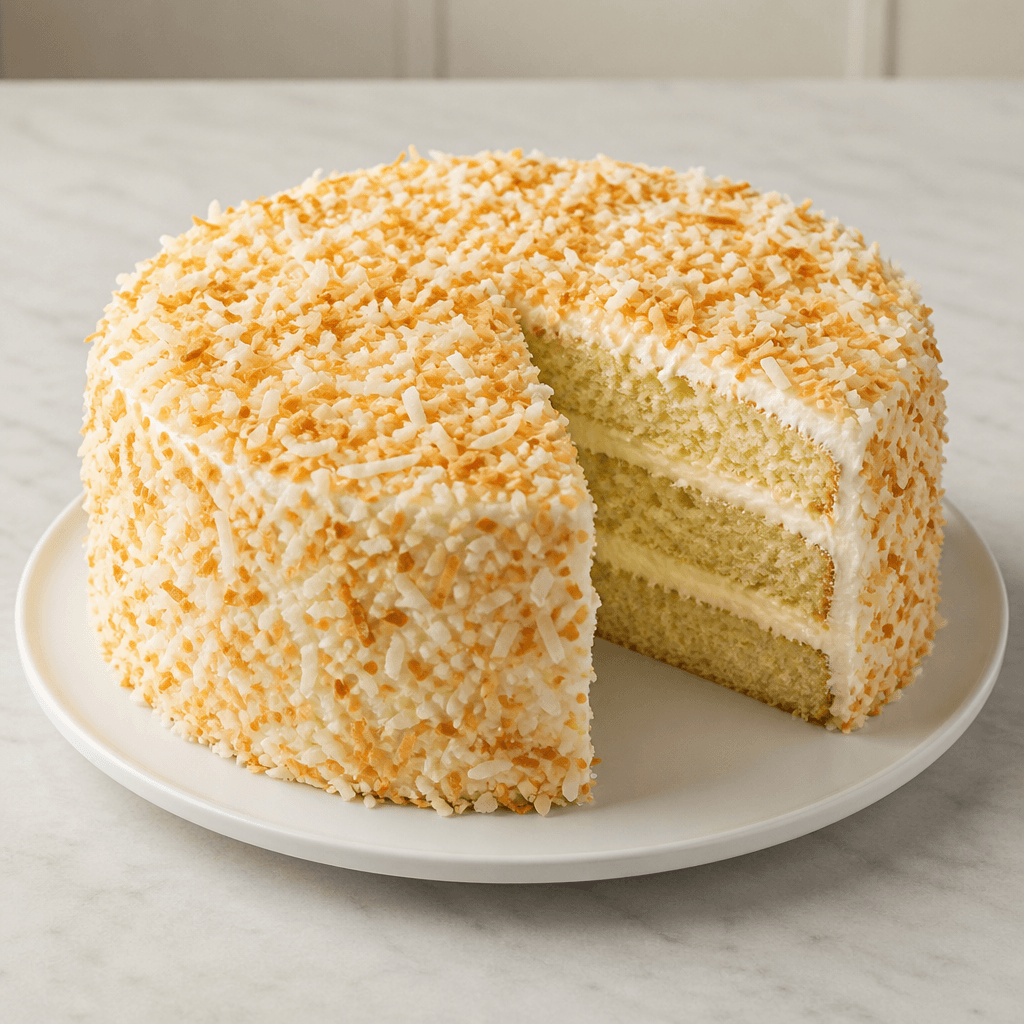
A luscious, bakery-style coconut cream cake with moist, tender layers soaked in sweetened coconut cream, filled and frosted with fluffy whipped cream cheese frosting, and blanketed in toasted coconut flakes. This is the kind of cake that disappears at every gathering — rich but not heavy, deeply coconutty, and absolutely stunning on any table.
Instructions
- 1
Preheat your Oven to 350°F. Grease two 9-inch round Cake Pans generously with Butter or Cooking Spray, then line the bottoms with Parchment Paper rounds and grease the paper as well. Set aside.
- 2
In a medium Mixing Bowl, whisk together the sifted All-Purpose Flour, Baking Powder, Baking Soda, and Salt. Set aside.
- 3
In a small Mixing Bowl or Measuring Cups, stir together the Coconut Milk and Sour Cream until smooth. Set aside.
- 4
In the bowl of a Stand Mixer fitted with the paddle attachment (or using a Hand Mixer), beat the Butter and Granulated Sugar on medium-high speed for 4–5 minutes, until the mixture is very pale, light, and fluffy. Scrape down the sides of the bowl as needed.
- 5
Add the Eggs one at a time, beating well after each addition. Add the Pure Vanilla Extract and Coconut Extract, and mix until combined.
- 6
With the mixer on low, add the All-Purpose Flour mixture in three additions, alternating with the Coconut Milk mixture in two additions (start and end with flour). Mix just until each addition is incorporated — do not overmix. The batter will be thick and silky.
- 7
Divide the batter evenly between the two prepared Cake Pans and smooth the tops with a Spatula. Bake for 30–35 minutes, until the tops are golden and a toothpick inserted in the center comes out clean or with just a few moist crumbs.
- 8
Let the cakes cool in the Cake Pans for 10 minutes, then turn them out onto Wire Racks. Leave them right-side up and let cool for at least 20 minutes before soaking.
- 9
In a small Mixing Bowl, whisk together the Cream of Coconut and Coconut Milk until smooth and combined.
- 10
While the cakes are still slightly warm, use a toothpick or skewer to poke holes all over the top of each layer — about 20–25 holes per layer. Slowly spoon or pour half the Coconut Milk soak over each cake layer, letting it absorb fully. The soak is the secret to an incredibly moist cake, so be generous. Let the layers cool completely before frosting.
- 11
While the cake cools, toast the Sweetened Shredded Coconut. Spread it in an even layer on a dry Baking Sheet and bake at 350°F for 5–8 minutes, stirring once or twice, until golden and fragrant. Watch it closely — it can burn quickly. Transfer to a plate and let cool completely.
- 12
In the bowl of a Stand Mixer fitted with the paddle attachment, beat the Cream Cheese and Butter together on medium-high speed for 3 minutes until completely smooth, fluffy, and no lumps remain.
- 13
Add the sifted Powdered Sugar, Pure Vanilla Extract, Coconut Extract, and Salt. Mix on low until the sugar is incorporated, then increase to medium-high and beat for 2 minutes until smooth.
- 14
Switch to the whisk attachment (or use a Hand Mixer with a clean bowl). With the mixer running on medium-high, slowly stream in the cold Heavy Whipping Cream. Continue whipping for 2–3 minutes until the frosting is thick, billowy, and holds stiff peaks. It should look like a cross between whipped cream and cream cheese frosting — light but stable.
- 15
Place one cooled, soaked cake layer on your serving plate or cake stand. Spread a generous, even layer of frosting over the top (about 1 cup). Place the second cake layer on top, pressing gently to level.
- 16
Apply a thin crumb coat of frosting all over the top and sides of the cake using an Spatula. Refrigerate for 15 minutes to set the crumb coat.
- 17
Apply the remaining frosting generously over the top and sides of the cake, smoothing or swirling as you like. Immediately press the toasted Sweetened Shredded Coconut flakes all over the top and sides, covering the cake completely.
- 18
Refrigerate the finished cake for at least 1 hour before slicing to allow the layers to set and the flavors to meld. Slice with a sharp Knife, wiping the blade clean between cuts for neat slices. Serve chilled or at cool room temperature.
60-day free trial
Cook this with your whole family on Homii
Save this recipe, plan your week, build smart shopping lists, and let Chef Mii adapt it to your household's tastes and allergies.
60-day free trial
Let Homii's AI run your kitchen
- Chef Mii plans meals around your tastes, schedule & budget
- A full week of dinners built in seconds
- Smart shopping lists, auto-organized by aisle
- Adapts every recipe for allergies & serving sizes
No credit card required