
春菜乳蛋饼
 早午餐1小时25分钟6 份中等
关于此食谱
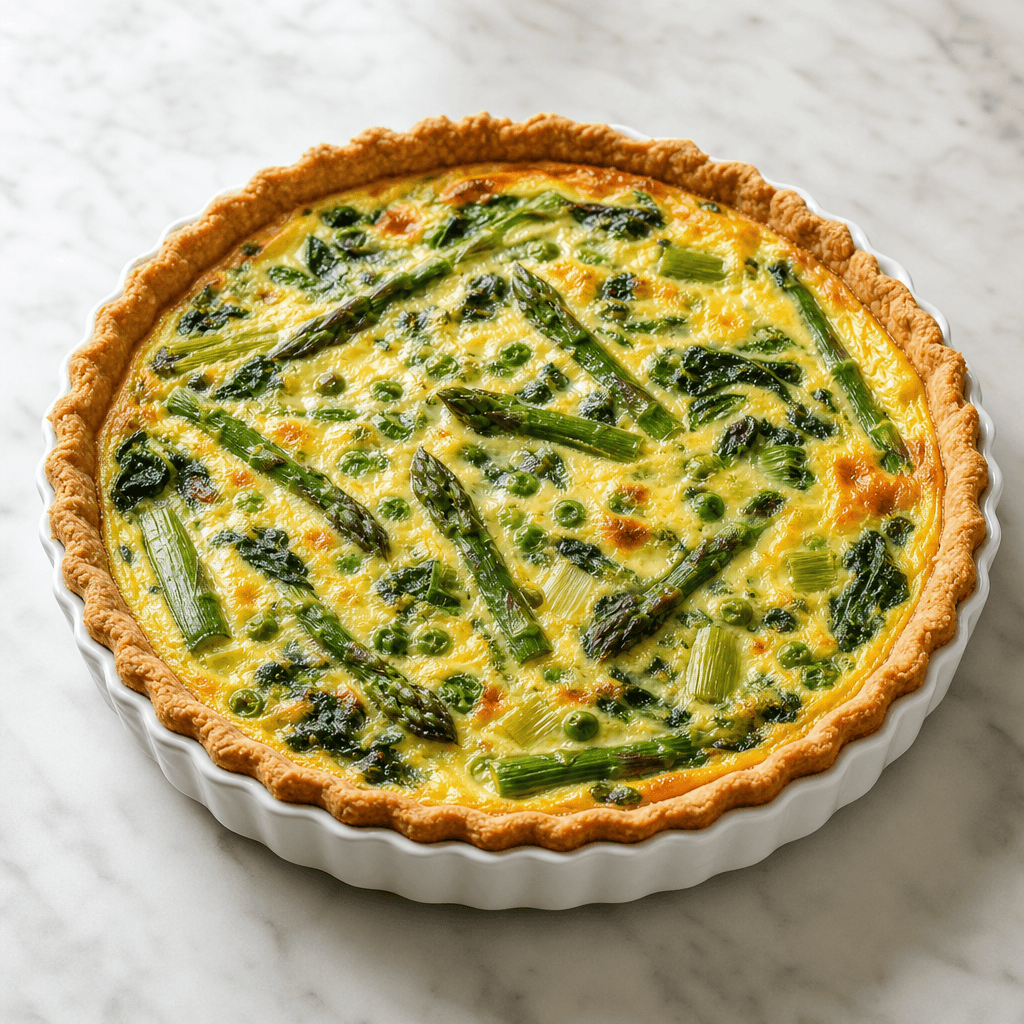
一道金黄色、滑顺的乳蛋饼,饱含嫩春菜——芦笋、韭葱、豌豆和菠菜——铺在黄油酥脆的油酥面团中。这道经典法式派馅饼优雅得足以招待早午餐宾客,又简单得足以作为平日晚餐。蛋奶液丝滑顺富,却不显沉重,蔬菜保持鲜亮清新的味道。可以提前制作,温热或室温享用——每次都可靠美味。
步骤说明
- 1
In a large Mixing Bowl, whisk together the All-Purpose Flour and Salt. Add the cold Butter cubes and use your fingertips (or a pastry cutter) to work the Butter into the All-Purpose Flour until the mixture resembles coarse breadcrumbs with a few pea-sized pieces remaining. This creates the flakiness.
- 2
Drizzle in 3 tablespoons of Ice Water and stir with a fork until the dough just comes together. If it's too dry, add Water one teaspoon at a time. Do not overwork — stop as soon as the dough holds when pinched. Shape into a disc, wrap in Plastic Wrap, and refrigerate for at least 20 minutes.
- 3
Preheat your Oven to ![375°F]. On a lightly All-Purpose Flour-dusted surface, roll the chilled dough into a circle about 12 inches in diameter and 1/8 inch thick. Carefully drape it over your Rolling Pin and transfer it into a Tart Pan (or Pie Dish). Press it gently into the edges and trim any overhang to about 1/2 inch, folding it back in to build up the sides.
- 4
Prick the bottom of the crust all over with a fork (this prevents puffing). Line with Parchment Paper and fill with pie weights or dried beans. Blind bake for 15 minutes, then remove the weights and Parchment Paper and bake for another 5 minutes until the bottom looks dry and just barely golden. Set aside.
- 5
While the crust bakes, heat the Olive Oil in a Skillet over ^[medium heat]. Add the Leek and cook, stirring occasionally, for 4–5 minutes until softened. Add the Garlic and cook for 1 minute more until fragrant.
- 6
Add the Asparagus pieces and cook for 3 minutes until just beginning to turn bright green and slightly tender. Add the Baby Spinach and stir until wilted, about 1–2 minutes. Remove from heat and stir in the thawed Peas. Season with Salt and Black Pepper. Let the mixture cool for 5 minutes.
- 7
In a large Mixing Bowl or large Measuring Cups, whisk together the Eggs, Heavy Cream, Milk, Salt, Black Pepper, and Nutmeg until smooth and fully combined. Stir in the Chives and Tarragon if using.
- 8
Spread the cooked vegetable filling evenly over the blind-baked crust. Sprinkle the shredded Gruyere Cheese evenly over the vegetables.
- 9
Carefully pour the egg custard over the filling, pouring slowly and evenly so it settles between the vegetables. Stop just below the rim of the crust — don't overfill or it may spill when moved.
- 10
Bake at ![375°F] for 30–35 minutes, until the custard is just set — it should have a very slight wobble in the very center when you gently shake the pan (like Jell-O, not liquid). The edges should be fully set and the top lightly golden.
- 11
Remove from the Oven and let the quiche rest on a Wire Rack for at least 15 minutes before slicing. This allows the custard to fully set and makes for clean, beautiful slices. Serve warm or at room temperature.